Displaying
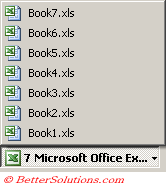
The default for Excel 2000, 2002 and 2003 is to display all your open workbooks as a separate icon on the taskbar.
 |
If you have a large number of Word documents currently open and you are using Windows XP then they will be automatically reduced to a single "group" icon on the taskbar.
 |
It is possible to switch this option off if you want to save space on the taskbar.
Select (Tools > Options)(View tab, Windows in Taskbar) and uncheck this checkbox.
If you switch this option off the only way to switch between the different windows is to use the Window drop-down menu.
You will also notice that the Maximise and Restore buttons will reappear on the Menu Bar.
Moving between multiple Workbooks
It is possible to have more than one workbook open at the same time.
This is a useful technique because it makes your workbooks more accessible.
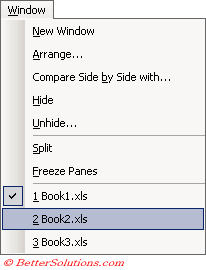
You can use the (Window) menu to quickly switch between your open workbooks.
The Window drop-down menu always lists all the workbooks that are currently open. It is also very handy to use to remind yourself what files you have got open.
The workbook that is currently displayed has a tick against it.
 |
Alternatively you can use the shortcut key (Ctrl + Tab) to toggle between your open workbooks.
You can also switch between workbooks using the shortcut key (Ctrl + F6).
In Excel 2002 and 2003 all open workbooks are displayed as a separate icon on the task bar.
If there are a large number of workbooks currently open then they will be reduced to a single icon if the task bar gets too crowded.
Excel 97 and Excel 2000 the Excel application appeared as a single icon on the taskbar.
Arranging your Workbooks
If you have several workbooks open, some of them will be hidden from view.
You can display the contents of multiple workbooks at the same time.
Select (Window > Arrange) to display the "Arrange Windows" dialog box.
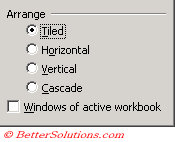 |
Tiled - This displays your workbooks one on top of the other or side by side. This is the default arrangement for multiple workbooks.
Horizontal - This displays your workbooks horizontally across the application (top to bottom).
Vertical - This displays your workbooks vertically across the application (side by side).
Cascade - This displays your workbooks cascaded from the top left hand corner. This is an overlapping diagonal layout as if the sheets were stacked on top of each other.
Windows of active workbook - This will only arrange the windows of the active workbook. Any other workbooks will not be displayed.
Minimising a Workbook
If you want to temporarily remove one of the open workbooks from view you can Minimise the window.
In the top right hand corner of the active workbook or window there are three Control buttons.
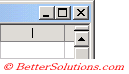 |
Minimise - This will minimise your window or workbook and place a small icon in the bottom left corner of your application.
The title on the window will be the name of the workbook.
 |
Maximise - This restores the workbook or window to its maximum size and will default the display to "Tiled".
Close - This will close the workbook or window.
If your workbook windows are not maximised then you can move each workbook window independently of each other by dragging the title bars with the left mouse button.
Important
If you have the same workbooks open every day then it may be worth saving them as a Workspace File. This is covered in more detail later on.
The "Compare Side by Side with .." command was added in Excel 2003.
The difference between a window and a workbook is that you can have several windows to the same workbook.
You can use the shortcut key (Ctrl + Tab) to move to the next open workbook or window.
You can use the shortcut keys (Ctrl + F6) or (Ctrl + Shift + F6) to move between all the open workbooks or windows.
© 2024 Better Solutions Limited. All Rights Reserved. © 2024 Better Solutions Limited TopPrevNext