Sections
A section contains one or more paragraphs.
A new document will typically only have one section although you can create more if necesary.
Page numbers are done on a section basis and you can specify the starting value for your pages
Margins are done on a section basis and you can change these from (File > Page Setup).
The last paragraph mark in a document or section stores both the paragraph and section attributes. If you copy this paragraph mark to a different document you will not only copy the paragraph attributes but the attributes for that section as well
You should only ever use section breaks if you need to include both types of page orientation (Portrait & Landscape) or you need two pages with different margins or headers & footers.
Each section within a document can have its own page size, margins, orientation, printer paper source, number of columns, headers and footers.
What attributes does a section have ?
Margins
Paper size or orientation
Paper source for a printer
Page borders
Vertical alignment
Headers and footers
Columns
Page numbering
Line numbering
Footnotes and endnotes
Section Attributes
1) Column formatting
2) Footnote and Endnnote appearance and location
3) Headers and Footers
4) Page numbering
5) Page orientation and page size
Splitting a document into sections allows you to customise the following:
Sections enable you to apply any setting from the Page Setup dialog box to specific portions of your document.
Sections give you a way to establish different settings for different parts of the same document.
The most common use for sections is if you want to include both portrait and landsacpe pages in the same document.
Section Breaks
Just as a Paragraph mark contains all the formatting for a paragraph, a Section break contains all the formatting for the precedding section.
You can quickly copy all the formatting within a section by copying the section break.
If you insert section breaks into your document this allows you to have different headers and footers for the different sections.
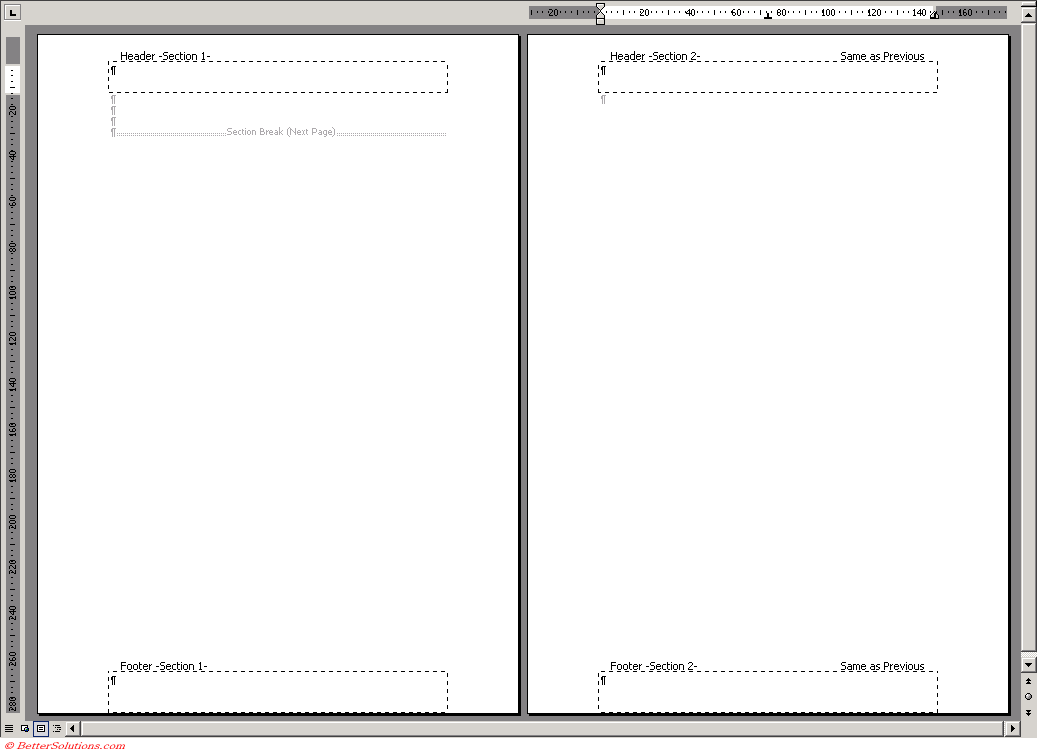
When you insert a section break into your document another header and footer is created for this section.
This header and footer is made the same as the previous header and footer by default although this can be easily changed.
This is indicated by the "Same as Previous" at the top right corner of the new section header and footer.
The number of the current section is indicated in the top left corner of the header and footer.
 |
By default any new sections will use the same headers and footers as the previous section.
It is possible to create different headers and footers by unselecting the "Same as Previous" button on the Header and Footers toolbar.
SS
Lets change the header and footer.
Changing the headers and footers in one section can affect other sections especially if the headers and footers are using the "Same as Previous" feature.
If you want to change the header and footer of a section which appears in the middle of a document, make sure the "Same as Previous" has been removed from the section you want to change and the section immediately after.
Section Marks
Section formatting is stored in an "invisible" character called a section mark.
Section marks only appear when you are working in Normal view.
There is also one invisible section mark located at the end of the document.
So if you can see two section marks in Word there are actually three.
The last section mark sits between the last visible section mark and the end of the document.
You can select, copy, move or delete section marks just like any other character.
This is often the cause of what appears to be strange layout and formatting behaviour.
You cannot move, cut or copy the section mark at the end of your document.
You will see any breaks automatically in Normal View, but to see then in Print Layour view you must have the Paragraph formatting displayed.
Headers and Footers
For each section you can create:
A different header and footer for each section
One header and footer for even pages and another for odd pages
One header for the first page and another for all the subsequent pages.
You can change the formatting within this section by placing the insertion point anywhere within the section and the selecting (File > Page Setup).
Make sure the Apply to drop-down list is "This section"
Word breaks documents into three subdivisions
A document contains one or more sections
A section contains zero or more paragraphs
A paragraph contains one or more characters including a paragraph mark
There are extra page breaks in my document
You might accidently inserted a manual page break. Switch to normal view, select the manual page break, and then press Delete.
Set a pagination option. The following pagination options (Keep lines together, Keep with next, or Page break before) control where automatic page breaks occur.
To remove the pagination formats from text, select the paragraph following the unwanted page break, click Paragraph on the Format menu, and then click the Line and Page Breaks tab. If necessary, clear the Keep lines together, Keep with next, and Page break before check boxes.
Inserted a section break. The Next page, Even page, or Odd page section break automatically breaks the page.
Inserted a column break. A column break inserted in the last column of a page will act as a page break. Select the column break, and then press DELETE.
I cant copy my formatting between sections
To copy section formatting (such as margin settings and newsletter-style columns), first switch to normal view.
Then, select the section break at the end of the section with the formats you want to copy.
Next, copy the section break to a new location; the text above the new section break takes on its formatting.
If you want to use the formatting of a particular section in other documents, you can store the section break as an AutoText entry and then quickly insert it when you want to duplicate the section formatting.
Select the section break, point to AutoText on the Insert menu, and then click New.
Important
You can use the (Edit > Find) dialog box to search for section breaks, click Special and then Section break.
Each section can have a different first page header and footer
© 2026 Better Solutions Limited. All Rights Reserved. © 2026 Better Solutions Limited TopNext