Illustrations
Every worksheet has an invisible draw layer, which lets you insert graphic objects.
Working with Pictures and Graphics
To paste a picture of a cell, chart or graphic object, select the object and then hold down Shift while selecting (Edit > Copy Picture)
SS - Toggles the display of the Drawing toolbar (Standard toolbar)
The term graphics refers to a whole range of objects including: clipart, wordart, photos, pictures, organisation charts
Adding graphics to your workbook will increase visual impact and emphasis
The Drawing toolbar offers a huge range of drawing tools for modifying existing shapes as well as creating more.
This toolbar also comes in handy for annotating your charts.
After you insert a graphic, small white squares called "selection handles" will surround the object's border
These selection handles indicate which object is currently selected.
To select an object just click anywhere on it.
When selection handles appear, you can the use these handles to move and resize the object.
You can use the worksheet gridlines as a guide.
If you want to draw a perfect square or circle then hold down the Shift key as you drag the handle.
If you change an object and it is not as you expected you can use (Edit > Undo) to ???
To add an Autoshape to your worksheet click the Autoshapes button on the Drawing toolbar and choose an Autoshape from the menu.
Then click the shape you want to add.
The "Change Autoshape" command is a special command for converting one shape into another (Draw > Change AutoShape).
If you have a list of countries with values assigned to each one, then (Insert > Map) will automatically construct a map to visually display the values.
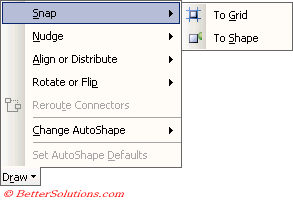
Snap Sub Menu
 |
To move an AutoShape select once and drag. To resize select once and drag one of the eight sizing handles in the appropriate direction. You can also flip, rotate, free rotate etc. More complex AutoShapes have additional sizing handles, these are in yellow and diamond shaped.
You can insert AutoShapes from the drawing toolbar. In addition you can apply drop shadows, text or 3D effects to the shapes.
For precise movements you can use the nudge operation. Draw > Nudge. Nudge operations will not move the object beyond the current window so you will have to manually scroll the display.
To add text to an AutoShape just right click the shape and select "Add Text". Once you have added your text just press Escape. You can format the text by right clicking the border and choosing "Format AutoShape"
AutoShapes are just pre-defined drawing objects such as circles and arrows that you can add to a worksheet to improve its appearance. Most AutoShapes allow you to add text.
To link an AutoShape to a cell, select the AutoShape and in the formula bar enter a formula that links to a worksheet cell
(Insert > Picture > From File) ??
If you have got Microsoft Clip Gallery installed then you can also insert sounds and films as well as images.
(View tab, Objects) - These refer to how graphic objects are displayed on a worksheet.
One of the easiest ways to add some text into a graphic logo is to use the WordArt feature.
There is even a dedicated WordArt oolbar that allows you to curve the text in various directions and to modify the spacing between letters.
Shortcut Keys
Important
You can hide and show a toolbar at any time by clicking with the right mouse button on any toolbar to display a list of all toolbars.
© 2026 Better Solutions Limited. All Rights Reserved. © 2026 Better Solutions Limited TopNext