Inserting
 |
To quickly insert another row to the bottom of the table, click in the last cell and press Tab.
Always ensure that the Table Row width is set to "single" and that the line is set to "at least 12pt".
A table can be inserted at any point in your text
By default tables start at the left margin
The Insert table button on the standard toolbar lets you quickly specify how many rows and columns you would like. Remember to hold the mouse button down while you drag.
Copy a selection of rows and columns from Excel and paste directly into Word (pastes as corresponding table that can then be formatted)
In regular publications tables are normally copied from Excel and pasted in Word. The tables are normally set up accordingly already in the document template so you just have to paste the new data over the top.
Inserting Rows
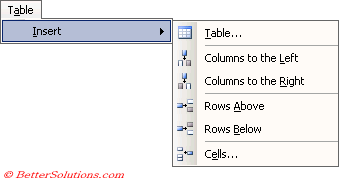
(Table > Insert > Rows)
You can add a new row to the bottom of a table by placing the insertion point in the last cell and pressing Tab.
 | Rows Above - |
 | Rows Below - |
SS >> SS
You can insert a row anywhere in a table using the (Select Row) ??
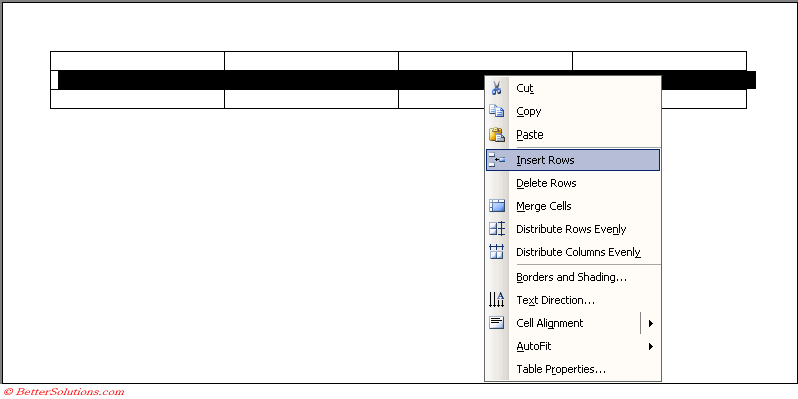
1) Right click and choose (Insert Row)
2) Using the Standard toolbar - Table button changes ??
Row is inserted above the row selected.
3) Click any cell and right click - Insert Rows
(Table > Insert > Rows Below) ??
Using the Shortcut Menu
You have to manually select the whole row (or column) though
 |
You can insert several rows at the same time by highlighting the number you want to insert before choosing (Table > Insert > Rows > Rows Above).
© 2026 Better Solutions Limited. All Rights Reserved. © 2026 Better Solutions Limited TopPrevNext