Creating
There are several ways you can create a table:
1) Using the Insert Table button on the Standard toolbar.
3) Using (Table > Insert > Table) - type or select the number indicating how many rows and columns
4) Using (Table > Draw Table)
5) Using Hyphens & Plus Signs(+ -------- + --------- +)
6) Or just copying it from Excel
Using the Insert Table button
This button can be found on the Standard toolbar.
This method is also useful when you know the exact number of rows and columns and do not need to control anything else.
 | When you have the correct size, release the mouse. |
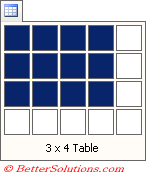
You will see the number of rows and columns that will be inserted at the bottom.
This displays a white grid of cells letting you drag down and across with the mouse to specify the exact size.
The table will always be inserted between the two margins and the columns will be always be distributed evenly.
The height of the rows is the same as the line spacing of the surrounding paragraph.
Using the Insert Table dialog box
(Table > Insert > Table) dialog box
This dialog box lets you define the width of your columns before the table is inserted
You can specify the exact number of columns and number of rows.
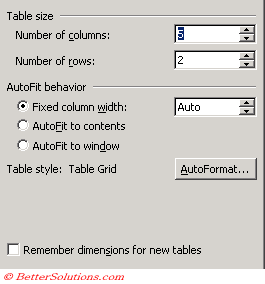 |
Fixed Column Width - You can specify the exact column width.
AutoFit to contents - Automatically adjusts the column widths based on the content in that column.
AutoFit to window - Automatically adjusts the width to fit the screen resolution. This only works when the doucment is saved as a web page.
AutoFormat - Displays another dialog box letting you choose from one of the many built-in table formats.
Remember dimensions for new tables -
2) Using the Insert Table button on the Table and Borders toolbar.
or on the (Tables > Insert) submenu.
 | Insert Table - |
Drag the area to the number of rows and columns
This method creates a uniform table. Each column and each row are the same size.
If you need to make changes to the column widths or row heights, this can be done later.
Defining the size of the table using the mouse.
Using the (Table > Draw Table)
You can always draw your tables freehand and use the Table and Borders toolbar.
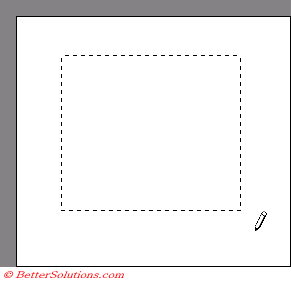
drag the drawing tool to create the outside box of the table. You can use the Eraser button to remove any unwanted lines ??
These buttons are on the Tables and Borders toolbar.
 | Draw Table - |
 | Eraser - |
This method is often quicker for creating uniform tables.
This is used in combination with the Table and Borders toolbar.
Suitable when you need a table containing rows and columns of different heights and widths.
 |
This lets you draw the tables using your mouse similar to how you would draw a table with pen and paper.
This is ideal for un-even tables.
When you display the Tables and Borders toolbar you are automatically switched to Print Layout View ??
Drag the mouse down and to the right until an outline appears. When you release the mouse the border will be drawn and the insertion point will be placed in the table.
You will have a table consisting of a single large cell.
You can create multiple cells by drawing additional rows and columns inside this border.
Word will automatically extend the line if it is close to an existing border.
Be careful not to craete a nested table by accident.
You can insert diagonal lines by dragging from one corner to another.
Drag the eraser over a line to remove it.
When you have finsihed drawing click the Draw table button again.
Using Hyphens and Plus signs
This lets you create a table by using just the keyboard.
You can create a table using plus signs and minus signs followed by Enter. The following creates a single row table with four columns (+---+---+---+)
this will only work if you have the (Tools > AutoCorrect)(AutoFormat as you Type tab, ????)
Make sure this feature is switched on !!
After you type a line, press Enter and Word will insert a one row table. You can then use the Tab key to insert more rows.
When you insert a blank table the height of each row corresponds to the height of the surrounding paragraphs
The width of each cell is directly proportional to the spacing between the plus signs.
If you are creating uniform tables (i.e. the same number of cells in each row) It is quicker to use (Table > Insert Table). If you are creating tables with a different number of cells in different rows it my be quicker to draw the table (Table > Draw Table)
Copying it from Excel
Important
When you create a table it will appear with gridlines, by default. The gridlines will not be printed. To remove the gridlines select (Tables > Gridlines). This is a toggle
A quick way to create a table of the correct size with the right number of rows and columns is to draw a single large one-cell table the correct size and use Split Cells to create the right number of rows and columns
The higher the resolution of your monitor the more rows and columns will appear on the Insert Table drop down
© 2026 Better Solutions Limited. All Rights Reserved. © 2026 Better Solutions Limited TopPrevNext