Creating
Creating Workbook Level Named Ranges
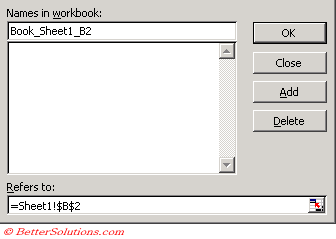
Select (Insert > Name > Define) to display the Define Name dialog box.
The address of the active cell (or range) will appear in the "Refers To" box initially.
An alternative way to display this dialog box is to use the shortcut key (Ctrl + F3).
This allows you to define and apply new names, change existing names and remove names.
Lets create a "workbook level" named range that refers to the cell "B2" on the worksheet "Sheet1" that can be referenced from anywhere in the workbook.
Select the cell (or range of cells) you want to add a descriptive name to, in this case select cell "B2" on worksheet "Sheet1".
Make sure the reference in the "Refers to" box always starts with an equal sign.
Type in the following "Book_Sheet1_B2" for the descriptive name.
 |
Names in workbook - The descriptive name you want to use for the cell or range of cells.
Refers To - You can create a range name very quickly by highlighting the cells. All cell references are absolute by default and also include their worksheet name.
Add - Creates a new named range for the cell range in the refers to box. This will not close the dialog box enabling you to enter several names at once. Adding a named range that already exists will overwrite it with no prompt.
Delete - Allows you to remove the named range that is currently selected.
OK - Closes the dialog box and saves any changes you have made.
Close - Closes the dialog box.
By default, references are fixed when names are created ??
© 2026 Better Solutions Limited. All Rights Reserved. © 2026 Better Solutions Limited TopPrevNext