Row Heights
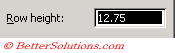
Row height is measured in points and there are 72 points to an inch. The default row height is 12.75 points (17 pixels).
This height is sufficient to display text in font size of 10 and 12pts.
The ends of the horizontal lines that separate the rows can actually be moved using the mouse.
Adjusting the height of the rows is very similar to adjusting the widths of the columns.
Excel adjusts the standard height of a row to accommodate the largest font used in that row.
Excel will not reduce the row height below 12.75 even if you choose a really small font.
Excel will not adjust the height automatically once you have made a manual adjustment.
Adjusting Row Heights
You can adjust the heights of your rows in various ways:
1) Using the (Format > Row) sub menu.
2) Using the Row shortcut menu.
3) Using the Mouse.
You can adjust multiple rows at once by highlighting them all first.
Using the (Format > Row) sub menu
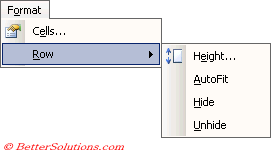 |
Height - Displays a dialog box letting you define the exact height of the selected rows. If no height appears in the row height dialog box then more than one row of different heights is selected. In either case you can enter a number between 0 and 409.
 |
AutoFit - Automatically adjusts the row height so all the text is displayed. This is not dynamic meaning that the row heights will not change automatically as you type in more text.
Hide - Adjusts the height of all the rows in the selection to zero.
Unhide - Adjusts the height of all the rows in the selection to the height they were when they were last visible.
Using the Row Shortcut Menu
An alternative to using the (Format > Row) sub menu is to use the Row shortcut menu.
This menu will be displayed if you press the right mouse button when the cursor is over a row heading.
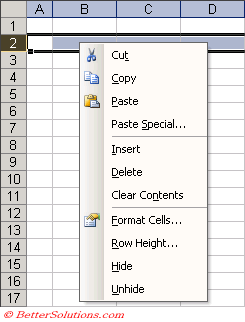 |
Row Height - Displays a dialog box letting you define the exact height of the selected rows.
Hide - Adjusts the height of all the rows in the selection to zero.
Unhide - Adjusts the height of all the rows in the selection to the height they were when they were last visible.
Using the Mouse
The easiest way to change the height of your rows is to position the mouse pointer on the line between the rows.
To display a hidden row or column, move the mouse pointer just to the right of the last visible column, before the hidden columns.
The mouse pointer will change to a vertical sizing grabber allowing you to click and drag.
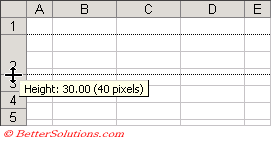
Position your cursor on the edge and the cursor will change to a double vertical black arrow.
You can drag the mouse down to increase the height of your rows or up to decrease the height of your rows.
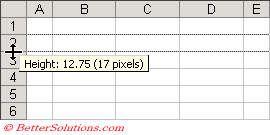 |
As you drag the bottom of the row the new height and the number of pixels is displayed in a screen tip.
 |
When you adjust the height of a row an on screen indicator shows the new height in points.
It is also possible to drag through several row headings to select them first before displaying the shortcut menu.
To change the size of multiple columns or rows select all the rows (or columns) and using the right mouse button drag a line of any of the selected columns to the desired width.
If you have multiple rows selected, adjusting the height of one row will adjust all the rows in the current selection.
Handling Multi Line Text
You do not normally have to worry about text being too tall to fit in a row only when it spans more than one line.
When you create (or edit) a multi line text entry using the Wrap text or Justify Formatting options Excel will automatically adjust the row height.
AutoFit the Row
For more information please refer to the AutoFit Selection page.
Important
You can quickly remove any blank rows in a range by sorting.
Excel will automatically adjust the height of your rows if you increase the font size of the text.
You cannot change the default row height.
This also works with non-contiguous rows or columns by holding down the Ctrl key.
© 2026 Better Solutions Limited. All Rights Reserved. © 2026 Better Solutions Limited TopPrevNext