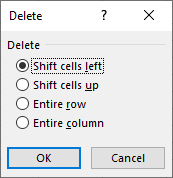
Deleting Cells
You can use the (Edit > Delete) dialog box to delete the selected cells.
When you delete cells, Excel will move the remaining cells in the column or row corresponding to the direction you specify.
You can also quickly display this dialog box by using the shortcut key (Ctrl + - ).
 |
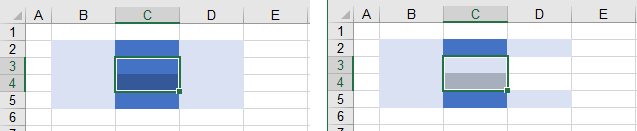
Shift cells left - Deletes the selected cells shifting the existing cells to the left.
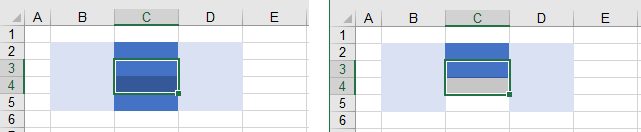
Shift cells up - Deletes the selected cells shifting the existing cells up.
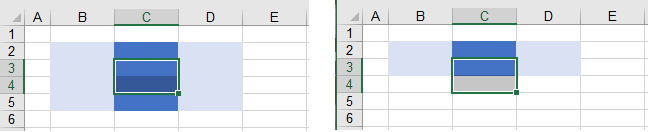
Delete entire row - Deletes the selected number of rows shifting the existing rows up.
Delete entire column - Deletes the selected number of columns shifting the existing columns up.
This dialog box allows you to specify where you want the cells shifted or moved to.
It is possible to delete a whole row or column or multiple rows and columns.
If you want to delete multiple rows or columns you need to highlight the cells first.
Shifting cells to the left
 |
Shifting cells up
 |
Any formulas that contain cell references (e.g. A2:B4) will have their formula automatically adjusted when you delete cells
Deleting an entire row
 |
Deleting an entire column
 |
Important
It is not possible to use the mouse to remove cells, you have to use the (Edit > Delete Cells) dialog box.
A quick way to display the Insert Cells dialog box is to press (Alt + H, I, I).
A quick way to display the Delete Cells dialog box is to press (Alt + H, D, D).
It is possible to delete whole rows and columns using several techniques. For more details please refer to section Deleting Data page in the Rows & Columns section.
© 2026 Better Solutions Limited. All Rights Reserved. © 2026 Better Solutions Limited TopPrevNext