Custom
If you do not want to use any of the seven built-in bullet formats you can replace them by creating your own.
The Bulleted tab of the Bullets and Numbering dialog box provides quick access to seven bullet formats.
These formats can be built-in formats or customised formats or a combination of both.
You can identify which formats are built-in and which are customised by looking at the Reset button in the bottom left corner.
If this button is disabled when you have one of the seven built-in formats selected.
The last bullet format selected becomes the default when you use the Bullets button on the Formatting toolbar.
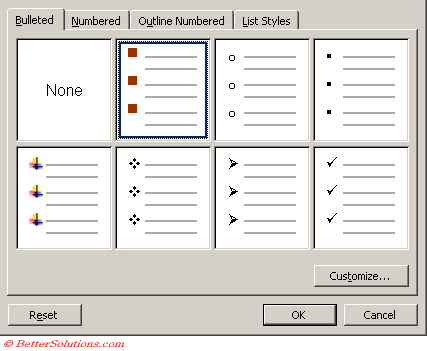 |
Customise - Allows you to customise the selected bullet format by displaying the Customise Bulleted List dialog box.
Reset - Resets your custom bullet format back to the built-in default. Each position has a defined default bullet format.
Customise Bulleted List Dialog Box
Select which one of the seven bullet formats you want to customise and press the Customise button.
This allows you to control every part of a bullet points appearance.
The preview box will give you some idea of what the "new" bullet format will look like.
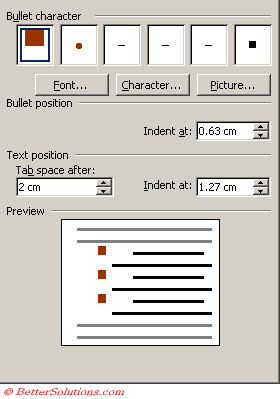 |
Font - Displays the familiar (Format > Font) dialog box.
Character - Displays the familiar (Insert > Symbol) dialog box.
Picture -
 | Indent at - (bullet position) This is how indented the bullet will appear and is the distance from the left margin to the left of the bullet. This is indicated with the first line indent marker. |
 | Tab space after - This is the distance from the left margin to the first line of text. This is indicated with the left tab marker. |
 | Indent at - (text position) This is the distance from the left margin to the second and subsequent lines of text. This is indicated with the hanging indent marker. |
Most of the time you will want to make sure that the "Tab space after" and the "Indent at" values are the same.
If they are not the same value then any multiple lines will not be aligned (as in the example below).
 |
Changing the Font
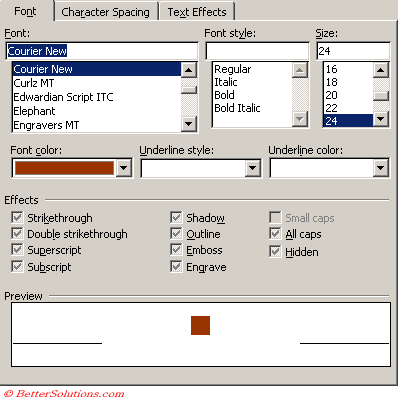
Select the Font button to display the standard Font dialog box letting you select a different font.
 |
Changing the Character
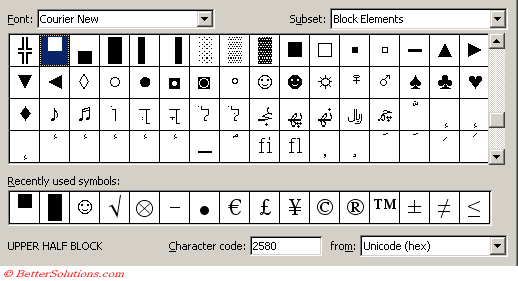
Select the Character button to display the standard Symbol dialog box letting you select a different symbol.
 |
Using a Picture
Select the Picture button to change the character to a picture or graphic.
For more details please refer to the Picture Bullets page.
Having Text as Your Bullet
It is possible to use text as your bullet points as well as characters, symbols and pictures.
In this example we want all the lines to start with the words "BetterSolutions.com"
 |
Highlight the paragraphs you want to apply the bullets to and select (Format > Bullets and Numbering).
Select the Numbered tab and select the numbered bullet format you want to change.
Press Customise to display the Customise Numbered List dialog box.
Type your text into the "Number Format" box and change the Number style to "(none)".
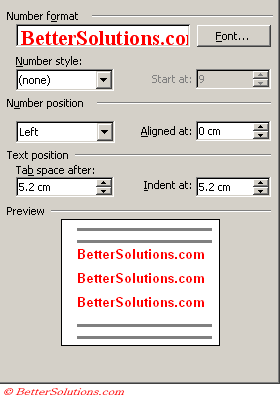 |
This new numbered bullet format will now appear on the Numbered tab.
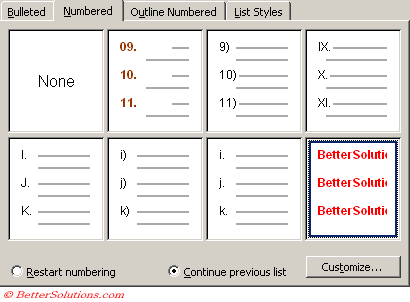 |
Important
If you create a bullet point that you particularly like you can easily add to your Normal.dot or to another template.
The Wingdings and Webdings fonts are particularly good for bullet characters.
By default the indentation used for the bullet is 0.25" from the left margin
By default the indentation for the text is 0.5" from the left margin.
© 2026 Better Solutions Limited. All Rights Reserved. © 2026 Better Solutions Limited TopPrevNext