Attaching a Custom Toolbar
Advantages of a Custom Toolbar
The toolbar will only appear when that specific document or template is opened.
A custom toolbar like all other toolbars can be repositioned and docked anywhere on the screen.
You can add as many custom toolbars to a document or template as you like.
Attaching a toolbar to a document or template can make it easier to distribute.
Any toolbars that have been attached to a document or template will automatically appear when that document is opened.
Attaching a Toolbar to a Document
It is possible to attach a custom toolbar to any document (or template).
Lets assume you have created a toolbar called "Better Solutions" that contains a few useful commands.
Lets also assume that this toolbar has been created in your Normal.dot template.
Before you do anything else make sure that the document (or template) you want to copy the toolbar from (and to) are open.
In this example we just need to open the document we want to copy the toolbar to since the Normal.dot template is always open.
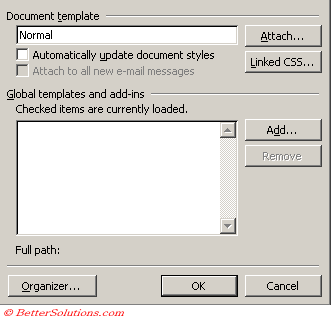
Select (Tools > Templates and Add-ins).
 |
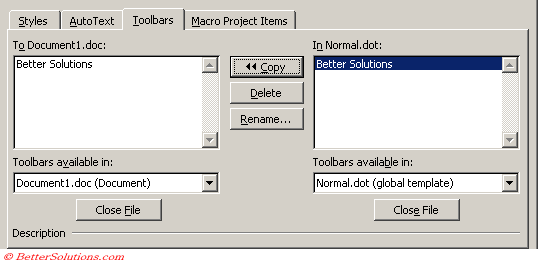
At the bottom of the dialog box select the Organizer button to display the Organizer dialog box and select the Toolbars tab.
 |
To attach the toolbar to Document1.doc make sure that Document1 is selected in the drop-down list on the left hand side.
Press the Copy button to copy the toolbar from the Normal.dot template to Document1.doc.
The Rename button can be used to change the name of an existing toolbar.
The Delete button can be used to remove an existing toolbar from a document (or template).
Important
The Organizer dialog box can also be displayed from the (Tools > Macro > Macros) dialog box.
The Organizer dialog box can also be accessed from the Style dialog box.
The Organizer dialog box can also be used to move styles, autotext and macros between document and templates.
© 2026 Better Solutions Limited. All Rights Reserved. © 2026 Better Solutions Limited TopPrevNext