Toolbars & Menus
Removed in 2007
A menu (or drop-down menu) is the way in which actions can be performed.
A toolbar is just a collection of icons that provides a shortcut to using a drop-down menu.
Toolbars offer quick shortcuts to commonly used commands and can be moved and repositioned.
The image that appears next to a command on a drop-down menu is usually an indication that this command also exists on a toolbar.
Excel contains two main menu bars, over fifty pre-defined toolbars and over fifty pre-defined shortcut menus.
You can re-position any of the toolbars using the mouse and they can be docked to any side of the application window.
To quickly display another toolbar select (View > Toolbars) and select the toolbar from the sub menu.
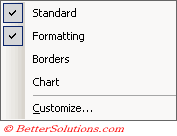 |
The ticks show all the toolbars that are currently displayed on the screen.
If the toolbar you want to display is not there you can press the Customise button at the bottom and select the Toolbars tab to get a full list.
When you first open Excel there are two toolbars displayed, the Standard toolbar and the Formatting toolbar. These are displayed on the same row initially although they can easily be adjusted to occupy two rows.
Alternatively you can right click on any toolbar to quickly display the (View > Toolbars) list.
The commands on a drop-down menu are divided into groups. This is to help you identify and remember the commands and to associate any commands that might be related.
Can I use the Keyboard ?
You can select menu commands by using the mouse or by using the keyboard.
Pressing the Alt key will activate the Menu Bar. Pressing the ESC key will deactivate the Menu Bar.
You can move between the menus by pressing the Arrow Keys or the Tab key. You can expand a particular menu by pressing the Enter key or the Up or Down arrow keys.
Alternatively you can select a particular drop-down menu by pressing the letter that is underlined on that menu.
Once the drop-down menu has expanded you can use similar methods to select the individual commands.
Once the command is highlighted you can press the Enter key to select it.
For example you could press (Alt + E, S) to display the Paste Special dialog box.
It is possible to use a different shortcut key to activate the menus and this can be changed from (Tools > Options)(Transition tab, Excel menu or Help key).
The slash (\) key can be used as an alternative to using the Alt key.
You can move between the visible toolbars by pressing (Ctrl + Tab) or (Ctrl + Shift + Tab).
Are there any Menu Conventions ?
All the Microsoft Office applications have standard conventions as far as the toolbars and menus are concerned.
Icons
 |
Icons are located to the left of some commands and indicate that there is a toolbar providing an alternative way to activate the command. The icon is the same as that used on the toolbar.
Shortcut keys
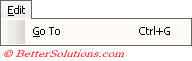 |
Shortcut keys are located to the right of some commands and indicate that there is an alternative (and faster) way to activate the command using a shortcut key (Alt + G).
Triangular Arrows
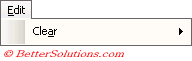 |
Triangular arrows are located on the far right of some commands and indicate that there is a submenu.
These are also known as Cascading menus.
Ellipsis (�)
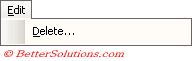 |
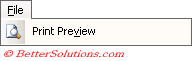
Ellipsis's are located on the right of the commands and indicate that a dialog box will be displayed in order to confirm the action.
Disabled
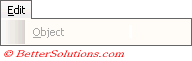 |
These are commands that are greyed out and indicate that the commands are unavailable at that time.
What are Screen Tips ?
A screen tip is the name given to the yellow box that appears when you hover over a command button.
These are extremely useful and can help identify the commands.
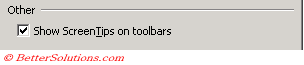
Make sure the Show screen tips on toolbars check box is ticked on the (View > ToolBars > Customise)(Options tab) dialog box.
 |
Why are there Two Menu Bars ?
There are actually two Menu Bars and these behave exactly the same as a toolbar.
The Menu Bar can also be moved although no other toolbar can be placed on the same row.
The Worksheet Menu Bar is the most prominent and is typically the one that is displayed most of the time.
 |
The Chart Menu Bar is automatically substituted for the Worksheet Menu Bar whenever a chart is active.
The only difference is that the Data drop-down menu has been replaced with a Chart drop-down menu.
You will notice that a lot of the commands on the other drop-down menus have been disabled.
 |
Docked or Floating Toolbars ?
Some of the toolbars you open are "floating" and some are "docked".
Floating toolbars can appear over the worksheet area and can be moved and dragged around.
Docked toolbars are anchored to the edge of the application window.
The different toolbars can be displayed or hidden at any time. A screen displaying fewer toolbars provides a larger and less cluttered working area.
You can move a floating toolbar by dragging its title bar. To anchor it you can double click its title bar.
To transfer a docked toolbar into a floating toolbar hover the mouse over a space in the toolbar and click and drag over the worksheet area.
When a toolbar is floating you can change its shape by dragging the borders or alternatively hide it by pressing the small cross in the top right corner.
You can use the Move Handle to drag and dock your toolbars.
This resembles a vertical line and can be found on the left of most toolbars.
Defining Groups on your Toolbars and Menus
Grouping commands can be useful and is easily done using the shortcut menu.
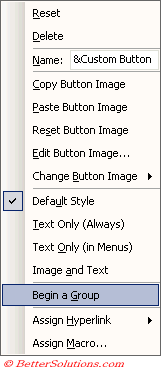
When the (Tools > Customise) dialog box is displayed you can select a command with the Right mouse button to display a Shortcut menu.
The "Begin a Group" button is a toggle and will insert a small horizontal or vertical line above or to the left of this command.
You can alternatively use the "Modify Selection" drop-down menu on the Command tab of the Customise dialog box.
 |
Adding and removing groups can also be done using the mouse although this is a little tricky.
To add a group line above a command just drag the command down (or to the left slightly).
To remove a group line just drag the command up (or to the right slightly).
Displaying Text Only or Text and an Image
The following buttons on the Shortcut menu all control how your commands appear although there are subtle differences.
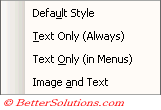 |
Default Style - This restores the default setting which is normally to display the image and text on menus but just the image on toolbars.
Text Only (Always) - The image will not be displayed when on a menu or on a toolbar.
Text Only (in Menus) - The image will not be displayed when on a menu, but will be displayed when on a toolbar.
Image and Text - The text and the image will be displayed when on a menu or on a toolbar.
Using Custom Toolbars
If you open a workbook that contains a custom toolbar (that has been attached to the workbook) the toolbar will stay behind when the workbook is closed.
The reason for this is because the toolbar has now been saved to the (".xlb") file meaning it will always appear when Excel is open.
When this toolbar is saved to the (".xlb") file it also stores a reference to the file that contains the associated event procedures.
This means that when you click a button on the toolbar Excel will automatically load the corresponding file and execute the code.
This means that every toolbar button is functional whether or not the associated file is actually loaded.
Problems can arise though when the location of the file is changed. Clicking on a toolbar button in this case will display an error message.
 |
Even if you know where the file is located loading it manually will not resolve the error either.
If there is more than one toolbar with the same name, the copy that is part of the default Excel workspace (i.e. saved in the ".xlb" file) will be the only one displayed.
The only solution to this mess is to close all the workbooks and delete the offending toolbar using (Tools > Customise).
Open Excel and then load the file manually before using the toolbar.
Saving your settings (".xlb" )
The xlb file format was used in Excel 2003 and earlier to save custom toolbar settings.
Any customisation that you do to your toolbars and menus is stored in an ".xlb" file on the C drive.
The file contains information on the position and visibility of all toolbars and menus including any custom toolbars and menus.
To totally reset all your toolbars and menus and to discard any personalisation exit Excel and delete the Excel.xlb file. A new one will be created the next time you open Excel.
Excel 2007 - C:\Documents and Settings\"user name"\Application Data\Microsoft\Excel\Excel12.xlb.
Excel 2003 - C:\Documents and Settings\"user name"\Application Data\Microsoft\Excel\Excel11.xlb.
Excel 2002 - C:\Documents and Settings\"user name"\Application Data\Microsoft\Excel\Excel10.xlb.
Excel 2000 - C:\Documents and Settings\"user name"\Application Data\Microsoft\Excel\Excel9.xlb.
This ".xlb" file is re-saved every time Excel is closed.
This file is user specific so two individuals using the same computer will have different ".xlb" files.
The larger this file is the longer Excel will take to open and close.
Important
Be aware that toolbars will overlap when there is not enough room on the screen.
Excel's new personalised menus only show commands you frequently use.
Some toolbars are context sensitive and will appear on the screen automatically when you perform a specific task.
You can close a toolbar by clicking on the small cross in the top right corner. This is only available when the toolbar is floating.
It is possible to make your toolbars and buttons larger by using the "Options" tab of the (Tools > Customise) dialog box. This can be done by checking the "Large Icons" check box.
To quickly display a toolbar, press the Right mouse button when over a menu or toolbar to display the (View > Toolbars) list.
Depending on the task you are performing Excel may display additional toolbars automatically.
To close a menu that you might have opened accidentally press ESC or click the menu item again.
© 2026 Better Solutions Limited. All Rights Reserved. © 2026 Better Solutions Limited TopPrevNext