Consolidating
If you have a group of tables (or lists) it is possible to combine (or consolidate) all this data into one table (or list).
This can be done using the (Data > Consolidate) dialog box.
You can use (Data > Consolidate) to combine the corresponding values in up to 255 different worksheets into a single worksheet.
Your data can be consolidated from several different source, either on the same worksheet, on different worksheets within the same workbook or even in different workbooks.
Before you merge the data you must first decide where you want to put the consolidated data.
You can put it on a separate worksheet in an existing workbook or on a worksheet in another workbook.
Function - Allows you to select the type of consolidate function you want to use:
| SUM | The total value of the numbers in a list or cell range. |
| COUNT | The number of numeric values in a list or array of numbers. |
| COUNTA | Count Nums The number of non blank cells in a list or cell range. |
| AVERAGE | The arithmetic mean of a list or array of numbers. |
| MAX | The largest value in a list or array of numbers. |
| MIN | The smallest value in a list or array of numbers. |
| PRODUCT | The product of all the numbers in a list or cell range. |
| STDEV | The standard deviation based on a sample. |
| STDEVP | The standard deviation based on an entire population. |
| VAR | The compound variance based on a sample. |
| VARP | The variance based on an entire population. |
Reference - Specifies the range of cells you select as a source area to consolidate with other source areas listed in the All references box.
All references - Lists the source area references selected for the consolidation.
Top row - This only used when you are consolidating by category.
Left column - This is only used when you are consolidating by category.
Create links to source data - This allows you to import all the detailed data of the source zones, but a generated outline will hide them. Without a link Excel will consolidate only the final values.
Types of Consolidation
There are several different ways you can consolidate your data:
1) Consolidate by Position - When the source data in the worksheets is in the same order and location
2) Consolidate by Category - When worksheets have the same row and column labels but the data is arranged differently
3) Consolidate by Formula - When there is no consistent layout, column labels or categories
Consolidating Ranges
Lets assume that all our data is on the same worksheet and the data is arranged in simple tables, one below the other.
First of all create a table below the other tables that will contain the consolidated data, in this case table "B14:F17".
Select the first cell in this range, i.e. "C15" and then select (Data > Consolidate) to display the Consolidate dialog box.
Altenatively you could highlight the whole range of cells "C15:F17", although Excel will populate the whole range automatically.
 |
For this example we are going to use the SUM consolidation function which is the default.
In the Reference box select the first cell range you want to use in the consolidation, in this case "C3:F5".
You can type the cell range in directly but make sure prefix it with the name of the worksheet enclosed in single quotes.
Press the Add button to add this range to the "All references" list.
In the Reference box select the second cell range, in this case "C9:F11" and press the Add button.
 |
Browse - This can be used when you do not have the workbook currently open. This will allow you to open the corresponding workbook.
Top row - The row label(s) will appear on the master worksheet.
Left column - The column label(s) will appear on the master worksheet.
Create links to source data - This option will mean that your consolidated table of data will update automatically when any of the original values change. This option inserts the necessary formulas in to the consolidated table.
Press OK to consolidate the selected ranges and to create the consolidated table of data.
When you are linking ranges on the same worksheet you cannot link the data, although the consolidated table can be very easily updated by selecting (Data > Consolidate) and then pressing OK.
Consolidating Worksheets in the same Workbook
Lets assume that the have the same data as above but this time the data is displayed on separate worksheets within the same workbook.
There are 2 worksheets in this workbook, one called 2004 and one called 2005.
First lets create another worksheet in this workbook which will contain the consolidated data.
 |
 |
Lets also assume that every worksheet lots identical. The cell ranges you want to consolidate need to be in exactly the same cells on every worksheet.
First of all create a table on the new "totals" worksheet that looks identical the other tables on all the other worksheets.
You can select the whole range of cells to ensure you get the whole range consolidated it is safer to just select the first cell.
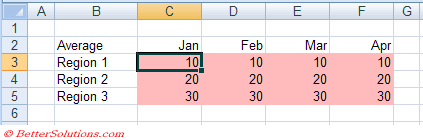 |
In this example we are going to use the Average consolidation function which can be changed in the Function drop-down list.
In the References box select the "2005" tab and select the range you want to use in the consolidation, in this case "C3:F5".
Press the Add button to add this range to the "All references list".
In the References box select the "2004" tab. You will notice that the corresponding range is automatically highlighted so just press Add.
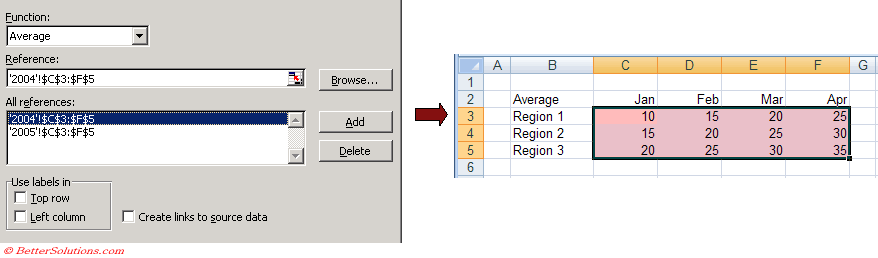 |
Press OK to consolidate the selected ranges and to create the consolidated table of data.
Consolidating several Workbooks
This is slightly more complicated and is explained on a separate page.
For more details please refer to the Consolidating Workbooks page.
Important
The method can be used to consolidate up to 255 worksheets into a single worksheet. The number of worksheets that you can have in a workbook is only restricted by the memory on the PC (i.e. how much RAM the PC has).
You can also use the Pivot Table Reports to consolidate data, for more information please refer to the Pivot Tables section.
To scroll without changing the current selection press Scroll Lock and use the arrow keys.
You can scroll a worksheet without changing the active cell. Press Scroll Lock.
You can also have your changes on one worksheet reflected on other sheets by making your changes to one worksheet, holding down Ctrl and selecting the other worksheets. Press (Edit > Fill > Across Worksheets).
Consolidating data does not affect the original values or data.
© 2026 Better Solutions Limited. All Rights Reserved. © 2026 Better Solutions Limited TopPrevNext